Wednesday, October 24, 2012

Quilt of Valor Update

Working on this Quilt of Valor quilt top has left an unexpected imprint on me, and the longer I work on it the deeper the impact.  Memories of my fun-loving Uncle Danny - my Mom's little brother and a Vietnam Veteran who passed away a few years ago.  Even more memories of my dear Father-In-Law, a WWII Vet who served at Iwo Jima, and thoughts of ALL those unforgettable Veterans who have served our country so well, many whom have given their lives doing their duty to protect us and those who couldn't protect themselves.  It gives one pause for reflection and contemplation and a renewed awareness of how fortunate I am to live in the greatest country on Earth.

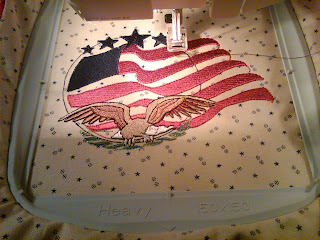
So, after much deliberation and even apprehension, I decided to add embroidery to this QOV quilt top for additional embellishment in the alternate quilt blocks and to honor the as-yet-to-be-named Quilt of Valor recipient.

Here are a few of those blocks:

One of my very favorite blocks - brings tears to my eyes every time I see it...


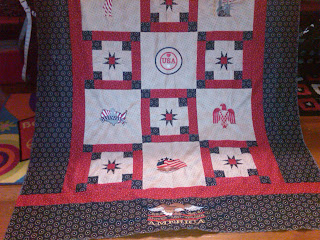
And here's the completed Quilt of Valor quilt top ready to be quilted.  

There is a personal block for the QOV recipient on the top border for their 'eyes only'.

I'm still making final decisions of how it will be quilted.  I know I will be using Rainbows Patriotic thread in the outer navy blue borders to do the McTavish flourishes, clear monopoly to do all the SID work and around each of the embroidered appliques, and Rainbows Sand Castle in the background of the embroidered blocks.  Still trying to decide which thread and colors to use in the star blocks and the red borders, in addition to what type of quilting to utilize in those same areas to best enhance this quilt.  Any suggestions from those of you in the machine quilting world would be much appreciated.

For now, I'm off to give this top its final press and get it loaded onto the frame.  Lots of SID work to do so, time to get to it...

Later,
~Deb

Sunday, October 21, 2012

Quilt Top Preparation


Quilt Top Preparation

These guidelines are to help ensure that your finished quilted heirloom will be as beautiful as you anticipate: 
  • Do NOT pin or baste the quilt sandwich (top, batting & backing)
  • Press seams well so they lie flat, but do not stretch or distort fabric
  • Remove ALL loose threads and stray pins
  • Check ALL seams and re-stitch any seams if necessary
  • Square-up the quilt top by measuring diagonally through the center of the quilt on both sides - these measurements should be the same
  • Pin the head of the top with a safety pin
Please Note:  Additional fees may be incurred for any quilt top preparation that is required prior to loading and quilting on the long arm quilting machine, aka Betty Boop.

Download and Print Quilt Top Preparation Sheet

Backing

If you provide the backing fabric for your quilt top, Please make sure:
  • It is 100% cotton fabric, bleached or unbleached muslin works well or 180 - 200 thread count sheets (sheets also need to be 100% cotton fabrics)
  • Remove ALL selvages - selvages are much denser weave and will not quilt properly or launder well after quilting and will cause puckering and skipped stitches during the quilting process
  • If using a sheet for your backing, remove ALL hems in addition to selvages
  • If you piece the backing, Please press ALL seams open rather than to one side, and ensure they lie nice and flat.  Remove and/or clip ALL selvages in backing seams (removal of ALL selvages prior to piecing your top and backing is preferred)
  • Make sure your backing is at least 6" longer and wider on all four sides than your quilt top to allow enough fabric to load onto the longarm quilting machine.  Example: if your quilt top measures 100" x 100", then your backing fabric will need to measure 112" x 112", which allows 6 extra inches on ALL four sides.
Please feel free to print-out these Quilt Top Prep Guidelines for future reference for your own personal use.  Pricing info available here:  Long Arm Quilting Services  We now accept PayPal!  (PayPal payment options available on the Quilts 'N Things Long Arm Services Pricing Page, and you may scroll to the bottom of this page for more info.)


Contact Me with any additional questions you may have...Thank YOU!

~Deb


 "It's not a quilt 'til it's quilted...!"

PS...
Additional quilt top information available here: How To handle wavy/uneven borders

Tuesday, October 16, 2012

Dog Quilt FINALLY on the frame...

I was beginning to think I was NEVER going to get this quilt together and on the frame w/all the endless things that need to be done on the quilting studio, but I finally got a break in between installing light fixtures and staining/varnishing wood trim and got it assembled and loaded onto the frame.  You'll remember I started this quilt over a month ago in September, so at least progress is finally being made:

One of the embroidered crazy quilt blocks w/McTavishing quilting

Another embroidered dog block next to black border

Close-up of black border

There are three outside borders surrounding the entire perimeter of the embroidered crazy quilt dog blocks - a black border, white border and black background w/primary color dog print for the final outside border, the same print used in the first two blocks.  There are several different dog prints used throughout the quilt that give a nice balanced variety and lots of colors to work w/different breeds of dogs.  

I'm running Superior's Rainbows Carnival thread in the darker borders, which reflects the majority colors of this quilt.  I LOVE Rainbows for its high sheen, durability and it's just sooo much fun to quilt with, especially on dark colors!  Of course I did my usual SID throughout w/clear monopoly prior to doing any of the McTavishing, which helps to stabilize everything and keep it from shifting with the fast-paced McTavishing quilting.

I'm going to try something different in the larger white border w/King Tut Sands of Time thread, which corresponds nicely with some of the other dog blocks and I'll let you know how it goes w/update sometime tomorrow. 

UPDATE: just finished quilting the white border w/King Tut Sands of Time and I quilted wandering dog paw prints.  Didn't know how this would turn out since I've never done this before but...looks pretty good:

Wandering paw print w/King Tut Sands of Time needle thread

Dog Quilt for Boy's Home coming off the frame

This is the fourth quilt destined for a Boy's Home for QFC later this month.  The first three were assembled by some of our talented and generous Quilters for Comfort members and sent to me for quilting, this Dog Quilt is my own personal design contribution.  

The first quilt was the infamous Car Quilt, the second was the Lighthouse Quilt, and the third was the Monopoly Money quilt - they've all turned out remarkably well and I'm so proud to have been honored and chosen to quilt them.

And for now, time to get some shut eye...;-)

Later,
~Deb

Sunday, October 7, 2012

Catching Up - QFC #2 AND #3 Getting Finished...

I've been soooo busy quilting trying to get ALL my charity quilts for QFC finished up this weekend so I can finish up my Quilting Studio now that the electrician has finished, (how many times did I just write the word 'finish-ed?;-), at least the upper level where my studio is going...YES!  I was beginning to think I would NEVER get to utter/write those words!  And as you can see, I have the finished quilts to prove it!

First in the quilt parade, the Lighthouse Quilt - QFC Boy's Home Quilt #2:

Lighthouse Block w/McTavishing quilting in the interior of the block 

Outside blue border and picture frame burgundy border

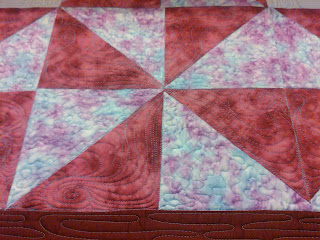
Alternating pinwheel block with more McTavishing and stipple quilting in the 'cloud' triangles

This is another QFC quilt top that was designed and created by one of our members and then sent to me to quilt on the longarm.  Initially, I was struggling trying to figure out how to quilt it.  After I added a blue marble border to the entire perimeter of the quilt, this gave me more quilting options and I had enough extra fabric for matching binding.  

Once I decided on the thread color to match this same blue marbled border, I followed it through the entire quilt, which gave it even more of a 'boy' feel as a nice side effect.  I did opt to quilt the lighthouse blocks w/clear monopoly because I didn't want the blue thread to detract from the embroidered lighthouse, and I think that was a good choice.

And here' the finished quilt:

Coming off the frame - has now been bound, gently washed and ready to ship!

QFC Boy's Home Quilt #3 - the Monopoly Quilt:

                                                                             Lots of challenging FUN with this one!

Since I quilted this top sideways, it gave even more quilting perspective when finished...

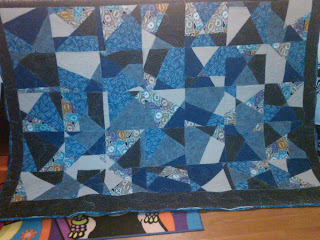
Another challenging quilt but once I got started McTavishing, (after several hours of SID w/clear monopoly) I really had a blast quilting this quilt and I think it turned out surprisingly well.  You tell me:

Off the frame w/double-fold binding attached and turned, ready for the final blind-stitching

It's ready for the final stitch down and I'm ready for bed!

This will wait 'till evening - catch ya'll later...
~Deb 

UPDATE:  10/7/2012:   Binding stitched down, gently laundered, label attached and ready to ship ;-)