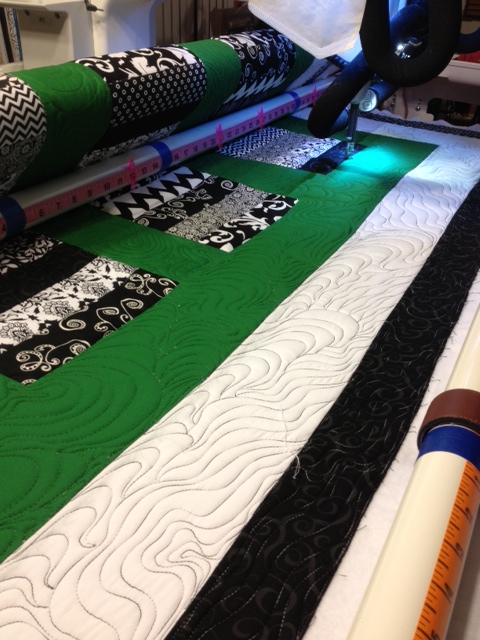
Tuesday, April 9, 2013

Betty's a real leader - Quilting Leder, that is ;-)

Many have asked me time and again how I make my secondary quilt leders that Betty uses w/primary leders and exactly WHAT is all this about?  I wish I could take all the credit for these ideas I'm about to share with you, but they have evolved initially from others I've picked up along the way.

Giving credit to EVERYONE would take up far too much space and time but suffice to say, the original idea came from award-winning, professional quilt artist, Sharon Schamber.

When I first watched her youtube.com video on how to make secondary leders while trying to set-up my first frame quilting system with my glorious 9" machine and home-built wooden frame, I knew I had stumbled across what I was looking for.  Here's the actual video of Sharon's I first watched more than 3 years ago:


I took her secondary leder idea and tweaked it just a bit to accommodate the Red Snappers I wanted to use.  Sooo, where Sharon sews on her backs and others use pins or zippers to attach their quilt tops to the secondary leder,  I use the Red Snappers.  To be able to do that, I first sew the 'hook' side of Velcro to the BOTTOM of my primary leders - the take-up leder and the backing leder, since I float ALL my tops:

Sewing black 'hook' Velcro to bottom edge of primary leder - note the white 'loop' velcro on the top edge, (lower bottom of photo) of the HQ leder that attaches to the pole.

Be sure and sew down 'both' sides of the black 'hook' Velcro to ensure a nice, secure hold:


Now it's time to make secondary leders.  Make various sizes according to what size quilts you intend to quilt.  For my first leders, I took Sharon's advice and made full-size leders to accommodate the entire size of my frame bed, which is 12 feet.  I subtracted 6" from the length to allow for pole gears, etc. and made each leder at least 18" wide/deep.  Hemmed ALL 4 sides w/1" double-fold hems and attached black 'loop' Velcro to both TOP sides of the secondary leders:

Be sure and hem the sides FIRST so as not to sew shut bottom hem for the rod of Red Snappers to slip through.  This is a great time to add a personal touch like embroidery, applique, logo, etc.


Here is an example of the secondary leder being used w/Red Snappers attached to a quilt top just getting ready to be quilted:

See the Red Snapper resting just below the dead bar?

I now have several different sizes of secondary leders made from an assortment of fabrics w/various embroidery motifs.  They are fast & FUN to make, and allow for all kinds of personal embellishments.   

What I LOVE most about this system is the ease and speed I can attach a quilt top and if need be, remove/re-position for later or to turn a quilt if you so choose, (which I personally rarely do.  I avoid turning a quilt top at ALL costs!)  And notice how nice and straight everything is - was able to load this top and pin-baste prior to machine basting, in less than 15 minutes!

Hope this helps you in your quilting endeavors.  Drop me a line and send some pics if you choose to make a similar 'system' for your own frame set-up, I'd love to see them!

Later,
~Deb 

Wednesday, April 3, 2013

Betty's got some New Diggs...

Well, she's FINALLY set up after a few stumbling blocks.  A BIG Thank YOU to Mike & Greg at HandiQuilter for helping me get all the bugs worked out on this new set-up!

And I had forgotten just how long it takes to sort and display thread/rulers/templates/stencils - I don't remember it taking this long to have it 'thrown into a pile' in 5 minutes or less ;-):

And doesn't she look all spiffy in her new Diggs?!

I wish I could tell you that's ALL the thread I have but...I'd be lying.  However, it is 'most' of the quilting thread but remember, I also embroider, sew/serge clothing, etc., sooooo, there's still ALL that thread to be sorted, etc. 

UPDATE 4/5/2013:  Decided to change the way the center thread would be stored and hung shelving, which I like much better:


Re-purposed a vintage cabinet for bobbin thread and bobbins:

              The 3 drawers store ALL my bobbins 

This corner cabinet is great for stashing all that quilting 'stuff'

And Betty and I agree on one thing for sure:

Quilters Rule!

But I just couldn't resist throwing a quilt top on this new frame and start quilting, wouldn't you???:

          Serenity Quilt getting quilted - long overdue!

Adding McTavishing ;-)

  Lookin' good so far...                                             

And now, time to get back to it, including hanging MORE shelving!

Later,
~Deb

UPDATE 11/26/2012:  Hurricane Sandy Quilt #1, The Good Morning Quilt
UPDATE   2/25/2013:  Hurricane Sandy Quilt #2, Renewal
UPDATE   4/03/2013:  Hurricane Sandy Quilt #3, Serenity


Friday, March 22, 2013

Getting Closer to Movin' In...!

Who knew that 'purple foam underlayment' was a pre-requisite to installing a hardwood floor...certainly not me, but I guess it helps with leveling/cushioning/insulating the final floor:

There's only one way to install this stuff - you guessed it...
on one's hands and knees!  The boards help keep the 'purple stuff' from curling up ;-)

If someone would've mentioned to me just how hard it is to lay the first two courses of wood, I probably would have phoned Wood Floor Installers 'R Us 'cause I spent more than 8 hours trying to get those two lined up/level/in place while cutting around 4 of 8 total furnace vents!

And I have the banged up hands/fingers to show for my labors:

This is what happens when one loses their patience and decides to whop a board in place and misses!

Blue painter's tape is not just for painters - 
works great for stopping bleeding 
after a furnace vent scrapes the skin off a knuckle!

But after a somewhat bumpy start, we started to see some significant progress.  I say 'we', because without my youngest son's help, I would still be up there laying planks! A BIG Thank YOU, Mr. B!!!

Making some serious progress:


Closing in on a finish line:

Remember this space - where the kitchenette will go ;-)

None of this would be possible - at least not as easily or quickly without one of my favorite tools, Chucky:

He's 'cheddar' in color and a 12" chop saw soooo, 
the name Chucky just seemed logical

Chucky came with Tom, the table saw as part of my Christmas this past year Thanks to the hubs - I like them 'almost' as much as my Betty Boop quilting machine (Please, don't tell Betty!)

And, tah dah:

Won't Betty look gorgeous sitting on this walnut floor??!!

And now, off to install that trim so Betty Boop can FINALLY get to her final place of glory...

Later,
~Deb

PS...thought I'd share my secret weapon:

Dark chocolate Espresso Beans!

My oldest daughter sends these to me from Boston for ALL major holidays - just got a fresh batch for my Bday last week, Thank Goodness...Thank YOU Miss J!!!

Monday, March 11, 2013

Another Monday Mash-up w/Construction Updates...YEAH!

And yet another Monday Mash-up, this time w/long over-due construction updates to my quilting studio...YES!  Finally, starting to see some serious progress - I was beginning to think we would NEVER finish anything on this project.  At least now I can say/brag the bath is completely finished w/trim, running water w/sink:

Bath entryway - and YES, I personally spent more than 12 hours 
hanging this door in a 2" x 6" door frame!

 
Bath vanity and matching medicine cabinet from Kirchner's,
w/running water via Morgan's Plumbing...Thank YOU!

         and even bath towels and...                                          

                                                             ALL trim and barn siding - fancy and ...Kirchner's Building Center

Betty ready for showering

While the bath is FINALLY  completed, the rest of the studio still needs some work:

Eventually, there will be a small kitchenette here after the floor is installed, 
for now it is the designated work area for wood cutting/sanding/staining/sealing

Hardwood floor ready to be installed - awaiting a few more crucial pieces

This is where Betty Boop will go under the studio lighting 
in front of two west facing windows once the floor is in...

Yep, there's already a broken window and I was nowhere in sight when it happened.  Apparently, improper installation of the window raiser handles (is that a real term?) causes the windows to become damaged by the screws from the handle.  I am promised a new window soon!  We actually had a local Priest come to see our windows for possible installation in a rectory - Betty and I felt honored.  He even liked the red ceilings and just so ya'll know, Yes - we did put Betty 'under wraps' in the bath while Father John was visiting ;-)

And now just got the Lake Blue batik fabric in the mail:

Lake Blue and Chocolate batik for Hurricane Sandy Quilt #3, the Serenity Quilt borders w/bleached muslin

Serenity Quilt center pieced, ready for borders!
 
Time to add those borders...

Later,
~Deb

PS...Please help me wish a very special online quilter, 'Phyllis' a belated Happy Birthday!  Phyllis turned 84 years young this past Saturday and has been quilting for 72 years!!  Since 2007, Phyllis has quilted around 200 quilts on her Voyager, most for charitable projects - way to go Phyllis, you do all of us quilters proud!!!  

Wednesday, March 6, 2013

Quilting the Good Morning Quilt #1 for Hurricane Sandy

After completing the 'Renewal Quilt', Hurricane Sandy Quilt #2, it was time to move on or back to Hurricane Sandy Quilt #1, the Good Morning Quilt: 


This quilt is quite large and required a bit more quilting time but, once again, it was a blast to quilt and I even expanded on a couple of quilting techniques I can now add to my McTavishing arsenal, which worked quite well in the 6" purple floral border.  All the stabilization quilting was done w/clear mono-poly in between the strips, sashings, and borders, and to McTavish and outline both embroidered blocks.  The batik green border sashings were quilted w/So Fine's 40 wt., Lollies, and So Fine's variegated Great Barrier Reef was used to quilt the purple floral borders with McTavishing quilting.

Lower right corner embroidered block - I couldn't resist adding this one ;-)

And after all the FUN quilting, the Good Morning quilt was ready to come off the frame:

Trimmed and ready for binding

And now on to finishing up the piecing of the third Hurricane Sandy quilt, 'Serenity': 

 Piecing the Robert Kaufman Artisan batik strips, Lake Country - they are stunning!

So far, so good - now off to press and sew some more!

Catch up w/ya later...
~Deb 

PS...read the entire story about the Good Morning Quilt  

UPDATE 11/26/2012:  Hurricane Sandy Quilt #1, The Good Morning Quilt
UPDATE   2/25/2013:  Hurricane Sandy Quilt #2, Renewal
UPDATE   4/03/2013:  Hurricane Sandy Quilt #3, Serenity

Sunday, March 3, 2013

Renewal Quilt #2 for Hurricane Sandy Quilted

Got some serious quilting in the past few days and love how this one turned out:

'Renewal'coming off the frame

             Lots of FUN McTavishing

Multiple borders came out nicely

As always, I used clear mono-poly to SID in between ALL the borders and the 'bars of gold'/black and white strips, then LAVA lush green in the green areas and Black Sand variegated in the white and black borders.

And now, onto the quilting of the 'Good Morning' quilt #1.  I know, I know - I quilted them out of order but I have my reasons.  Originally, I was going to panto quilt both of these quilts, but after trying to print a digitized panto for about 3 hours, I gave up in frustration knowing I could've been quilting and got busy doing just that!  I'll try to figure the printing issue out later when I have more time.  For now, I'm way past a self-imposed deadline and I need to get done so I can go back to working on my quilting studio just as soon as the weather breaks, looks like Wednesday is my next best opportunity ;-)

So, like I always say...time to get back to it...

Later,
~Deb

UPDATE 11/26/2012:  Hurricane Sandy Quilt #1, The Good Morning Quilt
UPDATE   2/25/2013:  Hurricane Sandy Quilt #2, Renewal
UPDATE   4/03/2013:  Hurricane Sandy Quilt #3, Serenity

ALL 3 Hurricane Sandy Quilts Arrive safe & sound at their final destination...

Wednesday, February 27, 2013

To trim or not to trim...?

That is ALWAYS the question upon putting in that final quilting stitch and ultimately taking the completed quilt off the frame.  If it's a client quilt and the client wants the extra batting and backing left on, other than removing any loose threads and strings aka 'pruning the quilt', then our question has been answered...no worries.  If this quilt will be a treasured heirloom or one that will be entered into a judged show where every centimeter counts, then I'm not trimming 'til I've taken the quilt off the frame and squared it up.

However, if this is a quick project, one that will be loved and drug - I refer to this as a 'Hug 'n Lug' quilt, then I'm trimmin' while it's coming off the frame!

Gotta love those batting scissors - they work great!

Yep - I trim the top, sides and bottom while the quilt is coming off the frame, just keep those leaders far away from those batting scissors or you'll have them all trimmed up, too!:

Just look how nice and straight this is (this quilt was quilted sideways ;-)

As mentioned in a previous post, I take great pains to keep my quilt top nice and straight during the entire quilting process, checking my quilt top's alignment and pin basting with each roll of that top to ensure everything remains nice and straight.  Looks like it paid off once again, cause this quilt is straight as a string and lays nice and flat:

Just coming off the frame after being trimmed - 
everything looks nice and straight

Trimming a quilt while it comes off the frame is a great time-saver and one I highly recommend if you need to complete a project quickly and the quilt doesn't require blocking.  Give it a try and let me know how it works out for you...

Later,
~Deb