Friday, March 22, 2013

Getting Closer to Movin' In...!

Who knew that 'purple foam underlayment' was a pre-requisite to installing a hardwood floor...certainly not me, but I guess it helps with leveling/cushioning/insulating the final floor:

There's only one way to install this stuff - you guessed it...
on one's hands and knees!  The boards help keep the 'purple stuff' from curling up ;-)

If someone would've mentioned to me just how hard it is to lay the first two courses of wood, I probably would have phoned Wood Floor Installers 'R Us 'cause I spent more than 8 hours trying to get those two lined up/level/in place while cutting around 4 of 8 total furnace vents!

And I have the banged up hands/fingers to show for my labors:

This is what happens when one loses their patience and decides to whop a board in place and misses!

Blue painter's tape is not just for painters - 
works great for stopping bleeding 
after a furnace vent scrapes the skin off a knuckle!

But after a somewhat bumpy start, we started to see some significant progress.  I say 'we', because without my youngest son's help, I would still be up there laying planks! A BIG Thank YOU, Mr. B!!!

Making some serious progress:


Closing in on a finish line:

Remember this space - where the kitchenette will go ;-)

None of this would be possible - at least not as easily or quickly without one of my favorite tools, Chucky:

He's 'cheddar' in color and a 12" chop saw soooo, 
the name Chucky just seemed logical

Chucky came with Tom, the table saw as part of my Christmas this past year Thanks to the hubs - I like them 'almost' as much as my Betty Boop quilting machine (Please, don't tell Betty!)

And, tah dah:

Won't Betty look gorgeous sitting on this walnut floor??!!

And now, off to install that trim so Betty Boop can FINALLY get to her final place of glory...

Later,
~Deb

PS...thought I'd share my secret weapon:

Dark chocolate Espresso Beans!

My oldest daughter sends these to me from Boston for ALL major holidays - just got a fresh batch for my Bday last week, Thank Goodness...Thank YOU Miss J!!!

Monday, March 11, 2013

Another Monday Mash-up w/Construction Updates...YEAH!

And yet another Monday Mash-up, this time w/long over-due construction updates to my quilting studio...YES!  Finally, starting to see some serious progress - I was beginning to think we would NEVER finish anything on this project.  At least now I can say/brag the bath is completely finished w/trim, running water w/sink:

Bath entryway - and YES, I personally spent more than 12 hours 
hanging this door in a 2" x 6" door frame!

 
Bath vanity and matching medicine cabinet from Kirchner's,
w/running water via Morgan's Plumbing...Thank YOU!

         and even bath towels and...                                          

                                                             ALL trim and barn siding - fancy and ...Kirchner's Building Center

Betty ready for showering

While the bath is FINALLY  completed, the rest of the studio still needs some work:

Eventually, there will be a small kitchenette here after the floor is installed, 
for now it is the designated work area for wood cutting/sanding/staining/sealing

Hardwood floor ready to be installed - awaiting a few more crucial pieces

This is where Betty Boop will go under the studio lighting 
in front of two west facing windows once the floor is in...

Yep, there's already a broken window and I was nowhere in sight when it happened.  Apparently, improper installation of the window raiser handles (is that a real term?) causes the windows to become damaged by the screws from the handle.  I am promised a new window soon!  We actually had a local Priest come to see our windows for possible installation in a rectory - Betty and I felt honored.  He even liked the red ceilings and just so ya'll know, Yes - we did put Betty 'under wraps' in the bath while Father John was visiting ;-)

And now just got the Lake Blue batik fabric in the mail:

Lake Blue and Chocolate batik for Hurricane Sandy Quilt #3, the Serenity Quilt borders w/bleached muslin

Serenity Quilt center pieced, ready for borders!
 
Time to add those borders...

Later,
~Deb

PS...Please help me wish a very special online quilter, 'Phyllis' a belated Happy Birthday!  Phyllis turned 84 years young this past Saturday and has been quilting for 72 years!!  Since 2007, Phyllis has quilted around 200 quilts on her Voyager, most for charitable projects - way to go Phyllis, you do all of us quilters proud!!!  

Wednesday, March 6, 2013

Quilting the Good Morning Quilt #1 for Hurricane Sandy

After completing the 'Renewal Quilt', Hurricane Sandy Quilt #2, it was time to move on or back to Hurricane Sandy Quilt #1, the Good Morning Quilt: 


This quilt is quite large and required a bit more quilting time but, once again, it was a blast to quilt and I even expanded on a couple of quilting techniques I can now add to my McTavishing arsenal, which worked quite well in the 6" purple floral border.  All the stabilization quilting was done w/clear mono-poly in between the strips, sashings, and borders, and to McTavish and outline both embroidered blocks.  The batik green border sashings were quilted w/So Fine's 40 wt., Lollies, and So Fine's variegated Great Barrier Reef was used to quilt the purple floral borders with McTavishing quilting.

Lower right corner embroidered block - I couldn't resist adding this one ;-)

And after all the FUN quilting, the Good Morning quilt was ready to come off the frame:

Trimmed and ready for binding

And now on to finishing up the piecing of the third Hurricane Sandy quilt, 'Serenity': 

 Piecing the Robert Kaufman Artisan batik strips, Lake Country - they are stunning!

So far, so good - now off to press and sew some more!

Catch up w/ya later...
~Deb 

PS...read the entire story about the Good Morning Quilt  

UPDATE 11/26/2012:  Hurricane Sandy Quilt #1, The Good Morning Quilt
UPDATE   2/25/2013:  Hurricane Sandy Quilt #2, Renewal
UPDATE   4/03/2013:  Hurricane Sandy Quilt #3, Serenity

Sunday, March 3, 2013

Renewal Quilt #2 for Hurricane Sandy Quilted

Got some serious quilting in the past few days and love how this one turned out:

'Renewal'coming off the frame

             Lots of FUN McTavishing

Multiple borders came out nicely

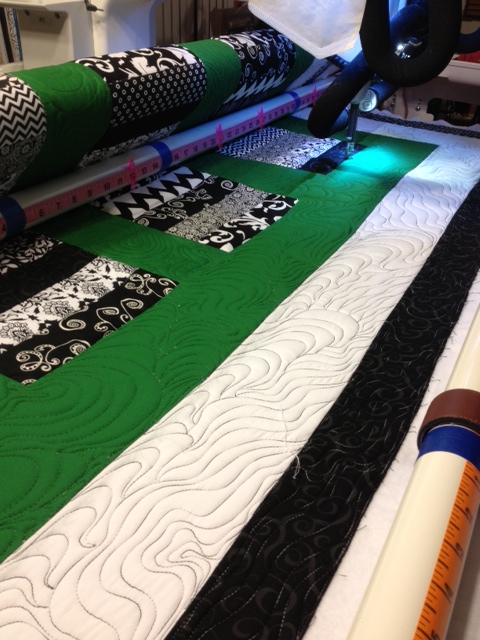
As always, I used clear mono-poly to SID in between ALL the borders and the 'bars of gold'/black and white strips, then LAVA lush green in the green areas and Black Sand variegated in the white and black borders.

And now, onto the quilting of the 'Good Morning' quilt #1.  I know, I know - I quilted them out of order but I have my reasons.  Originally, I was going to panto quilt both of these quilts, but after trying to print a digitized panto for about 3 hours, I gave up in frustration knowing I could've been quilting and got busy doing just that!  I'll try to figure the printing issue out later when I have more time.  For now, I'm way past a self-imposed deadline and I need to get done so I can go back to working on my quilting studio just as soon as the weather breaks, looks like Wednesday is my next best opportunity ;-)

So, like I always say...time to get back to it...

Later,
~Deb

UPDATE 11/26/2012:  Hurricane Sandy Quilt #1, The Good Morning Quilt
UPDATE   2/25/2013:  Hurricane Sandy Quilt #2, Renewal
UPDATE   4/03/2013:  Hurricane Sandy Quilt #3, Serenity

ALL 3 Hurricane Sandy Quilts Arrive safe & sound at their final destination...

Wednesday, February 27, 2013

To trim or not to trim...?

That is ALWAYS the question upon putting in that final quilting stitch and ultimately taking the completed quilt off the frame.  If it's a client quilt and the client wants the extra batting and backing left on, other than removing any loose threads and strings aka 'pruning the quilt', then our question has been answered...no worries.  If this quilt will be a treasured heirloom or one that will be entered into a judged show where every centimeter counts, then I'm not trimming 'til I've taken the quilt off the frame and squared it up.

However, if this is a quick project, one that will be loved and drug - I refer to this as a 'Hug 'n Lug' quilt, then I'm trimmin' while it's coming off the frame!

Gotta love those batting scissors - they work great!

Yep - I trim the top, sides and bottom while the quilt is coming off the frame, just keep those leaders far away from those batting scissors or you'll have them all trimmed up, too!:

Just look how nice and straight this is (this quilt was quilted sideways ;-)

As mentioned in a previous post, I take great pains to keep my quilt top nice and straight during the entire quilting process, checking my quilt top's alignment and pin basting with each roll of that top to ensure everything remains nice and straight.  Looks like it paid off once again, cause this quilt is straight as a string and lays nice and flat:

Just coming off the frame after being trimmed - 
everything looks nice and straight

Trimming a quilt while it comes off the frame is a great time-saver and one I highly recommend if you need to complete a project quickly and the quilt doesn't require blocking.  Give it a try and let me know how it works out for you...

Later,
~Deb

Monday, February 25, 2013

Monday Mash-up

I learned about this term from my DGD which means to take vintage music - maybe even two or more songs, and mix or 'mash-up' w/today's funky & fresh sounds and beats to produce a 'new age' mash-up tune...I like it!  Soooo, my Monday Mash-up consists of vintage fabrics and patterns, mashed-up w/today's fresh and crisp fabrics and design ideas to produce a 'new age' quilt or two.  In the future, that will apply however, for today's venue we have a mash-up of several projects combined to make one wild  week/weekend!

The first pic shows what a clothes dryer looks like without its door, drum and back cover, (and why I didn't get as much done last week as originally planned):

Clothes dryer torn down, ready for repairs

And one of the offending culprits - a melted/wollered* down pulley wheel that runs off the motor's drive shaft driven by the serpentine belt (I learned a whole lot this past week!  Those are my tools in the photo ;-):

No wonder the serpentine belt stopped turning the drum on the dryer!

Thank goodness for RepairClinic.com and YouTube videos or my dryer would not be back together and I probably would've had to buy a new one since there's no Maytag repair man in my neck of the woods (and this one is ONLY 6 years old!)

Here's the actual video I watched over and over and over to fix my dryer:

Right drum roller (I had to replace both of them along w/several other parts,
including wollered* out pulley wheel)

And doesn't he look all nice and pretty put back together:

I LOVE this dryer now that it is working again - all nice and quiet...
I can actually sew/quilt in peace without listening to all that squealing

I got it all torn down last Monday and had it all put back together late Monday night but was missing a few parts so, got online and ordered them at 1:30 am (CST) - they were here Thursday afternoon - way to go RepairClinic.com.  The hubs is still shaking his head in disbelief that 1) the parts arrived in less than a week and 2) that yours truly could actually fix this dryer by watching a youtube.com video.  He's secretly been bragging about his handy girl wife to his friends, I got word ;-)

And for the rest of the mash-up story, got some serious work done on one of my Hurricane Sandy Relief quilt tops:

Strip piecing the second Hurricane Sandy Relief quilt top

Coming along nicely -  these are Moda black & white jelly roll strips
w/green sashings from equilter.com - I really like the fresh green w/black & white

Ready to be loaded onto the quilt frame 
I think I'm going to call this one 'Renewal'

And I even got several blocks from Easy Street Part VIII pieced together:

Only 4 more left to go and I'm ready to assemble the entire top - YEAH!

Alrighty then, time to put away a few more clothes (we got behind on our laundry while the dryer was down, still playing catch-up) and after that, my Hurricane Sandy Renewal quilt top needs loaded and then I'm off w/very important rendezvous w/DGD!

That's it for this Monday Mash-up - what was yours like?

Later,
~Deb

*wollered - a technical MidWest term referring to an item or object that has been worn down or hollowed out  due to various external factors and variances ;-)

More Monday Mash-ups:
June 10, 2013 - Gardening, Oklahoma Quilt Relief, Wheat grinding & Bread making
August 5, 2013 - QBBs, Line Tamer, QFC quilt tops getting borders

Monday, February 18, 2013

Quilting QFC #2 Boy's Home Quilt

After the Boy's Home Horse quilt was complete, I was spurred on to get the second one done, too, and had a blast quilting the Jungle Animal quilt, it was a lot of FUN:

Made you smile...;-)

I grid quilted the animal squares, using the fabric lines as a guide, in addition to SID-ing the entire quilt to stabilize it w/clear mono-poly, and continued the mono-poly in each embroidered/appliqued animal block w/outline and McTavish quilting in those same blocks - as always, the mono-poly worked great.  The outside cheddar borders were quilted with a gorgeous Rainbows thread called Golden Glory which quilted out beautifully, not one single thread break!:

Rainbows 'Golden Glory' used to McTavish the borders

And I think it came out quite well:

Jungle Animal quilt coming off the frame

Both quilts are bound, labeled, boxed and ready to be shipped off.  And now to finish up those Hurricane Sandy quilts...

Later,
~Deb